Oswald Rivera

Author, Warrior, and Teacher

Category: desserts (page 1 of 3)

MAPLE BUTTERNUT SQUASH

Spring is here (in certain parts of the nation)  but squash is still available in stores. By that, I mean not only yellow squash but also butternut squash.

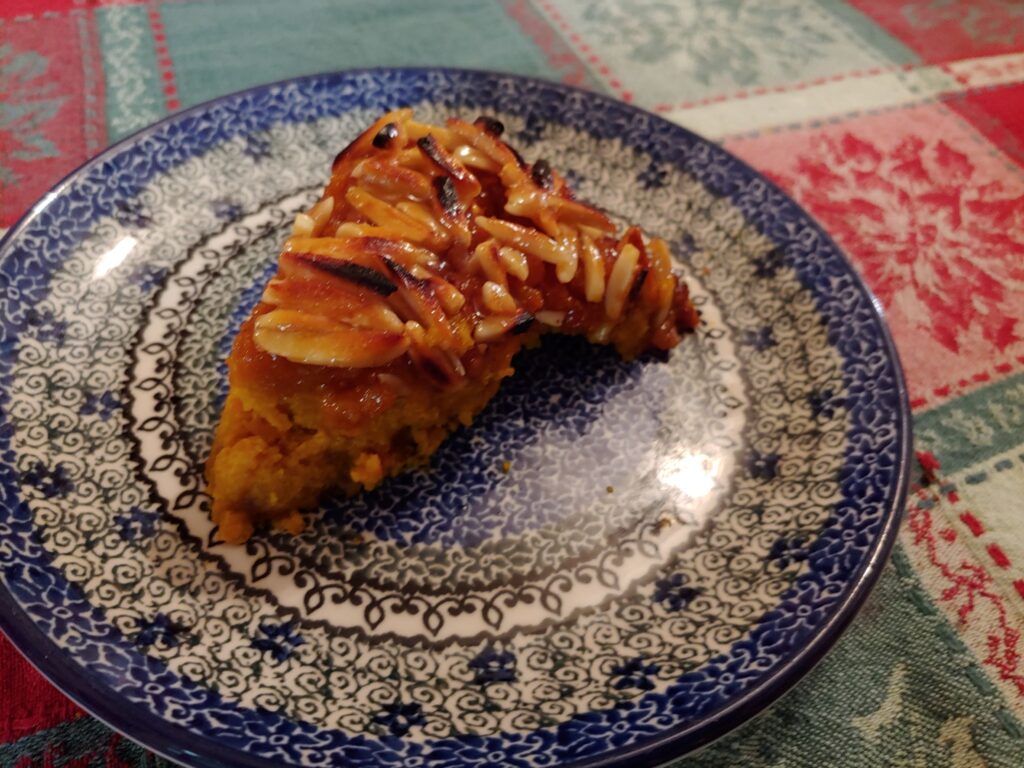
Butternut squash makes for a great side dish as well as a dessert. My wife makes great fried  chicken wings, and the Maple Butternut Squash I prepared was a wonderful accompaniment to the chicken wings. The recipe follows below. Let me add that you can make the dish as sweet as desired. Some folks add more maple syrup for instance, and more brown sugar. In our family we do not like squash overly sweet; but you may have your own ideas about it. Let your taste buds be your guide.

MAPLE BUTTERNTU SQUASH

Ingredients:

1 medium butternut squash
2 tablespoons butter
2 tablespoons maple syrup
1/8 teaspoon ground cinnamon
Dash of salt
1/3 cup chopped pecans
1 to 2 teaspoons brown sugar

Instructions:

  1. Preheat oven to 350 degrees F.
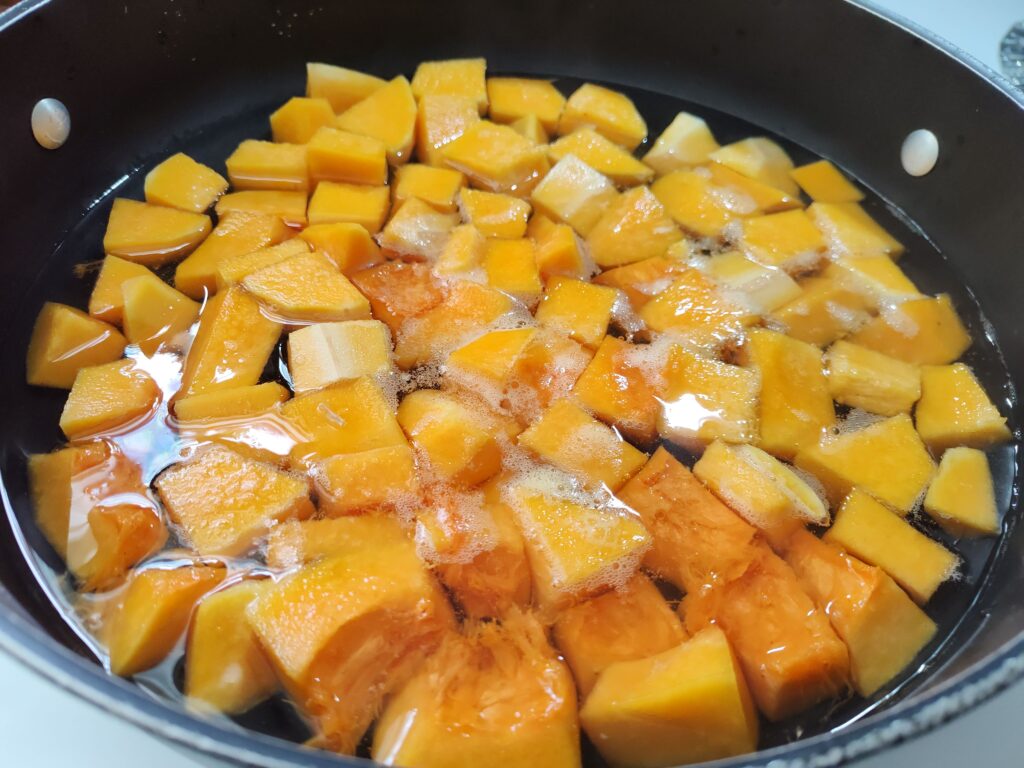
  2. Cut butternut squash lengthwise in half. Remove seeds and pulp.
  3. Cut into 1½-inch pieces. Place pieces in a pot with about 2 inches of water. Bring to a boil. Cover and steam on low heat for about 20 minutes, until tender. Remove and let cool slightly.
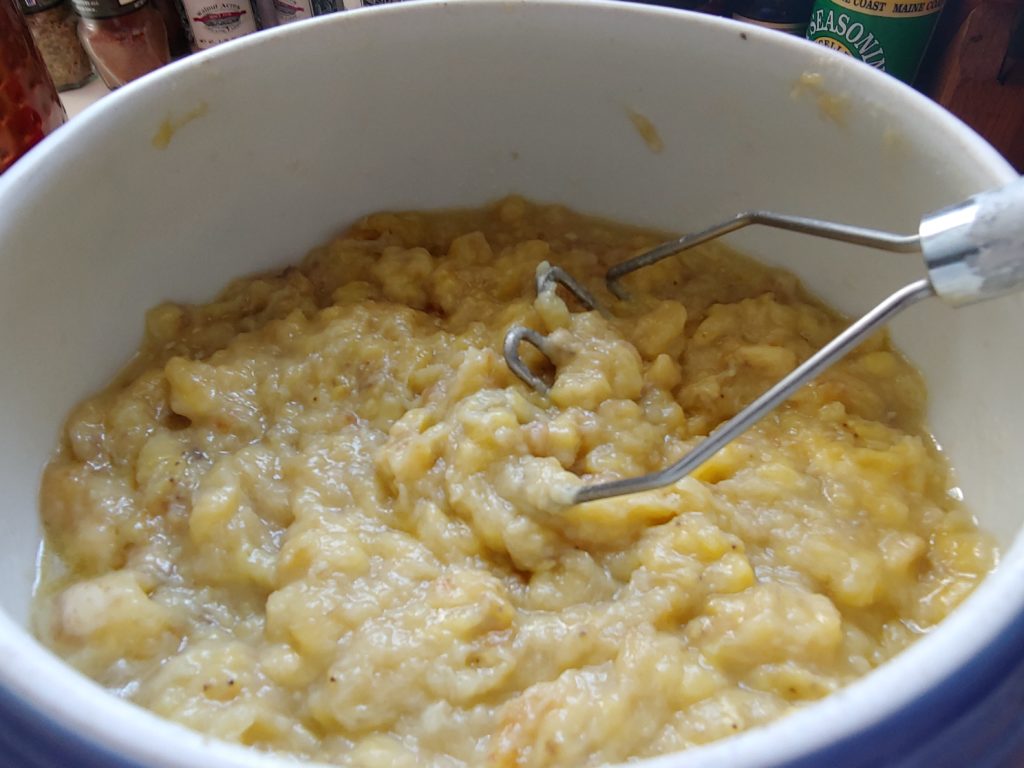
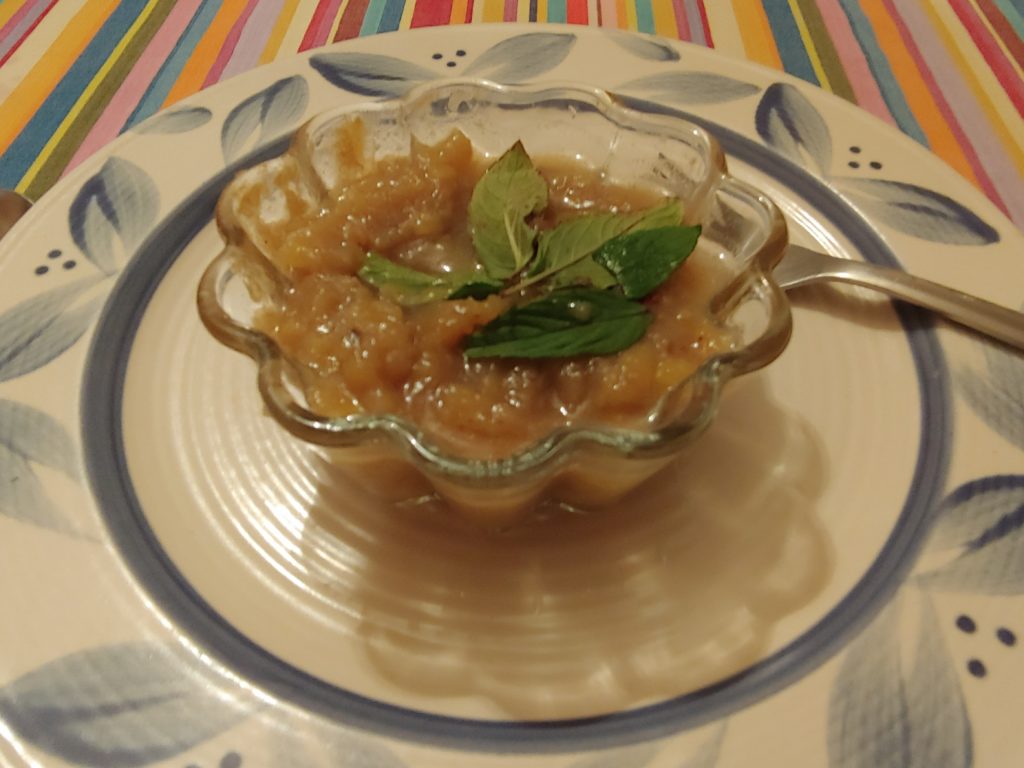
  4. Remove peel and put squash into a bowl. Mash with butter and maple syrup. Stir in cinnamon, and dash of salt to taste.
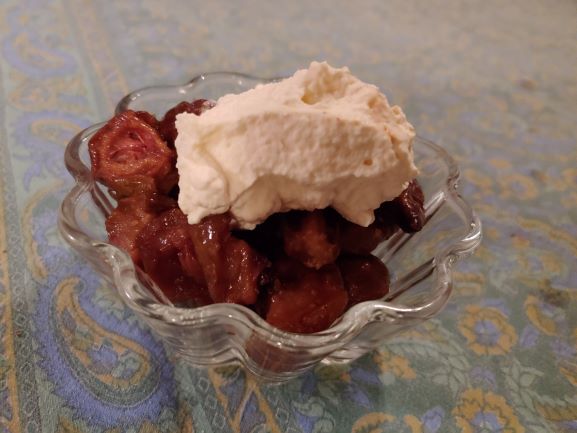
  5. Transfer mixture to a baking dish or 1-quart casserole. Combine pecans and brown sugar and sprinkle over the squash.
  6. Place in oven and bake for 20 to 25 minutes.
    Yield: 4 servings.

PERA CON RON (Pears with Rum)

This is a marvelous dessert that combines combine two of my favorites, pears and rum. Simple enough. Pera con Ron (Pears with Rum) brings that final, sweet tough to an evening meal, or you can have it as a treat anytime desired. It combines rum, honey and walnuts in majestic style. Let me add that this works best with dark rum. I’ve tried it with light rum, and it’s not the same. In this case, Puerto Rican dark rum is the best. Also, don’t worry about getting tipsy.  The alcohol content evaporates during cooking so that only the sweet flavor of the liquor remains.

So, make something extraordinary for family and friends today, be it a grand conclusion to dinner or lunch (not to mention brunch). You’re gonna like this one.

PERA CON RON
(Pears with Rum)

Ingredients:

6 ripe pears
2 tablespoons dark rum
½ cup honey
3 tablespoons water
4 tablespoons chopped walnuts
2 tablespoons water

Instructions:

  1. Preheat oven to 350 degrees F.
  2. Rinse pears under cold running water and pat dry with paper towels. Slice in half.
  3.  Combine rum, honey and 3 tablespoons water.
  4.  Arrange pear in baking pan and spoon rum mixture into center of each half.  Sprinkle with walnuts. Put 2 tablespoons water in bottom of pan. Bake for 20 minutes.
    Yield: 4-6 servings.

MAJERETE (Corn Pudding)

Majerete (Mah-heh-reh-teh) is a dessert that is popular in the Caribbean but, depending on where, it has variations. Traditionally, majerete is a corn pudding made from freshly husked corn.  Think of it as a smooth corn-type custard. The Spanish verb majar  means to grind or crush, and in the old days that’s  how it was done, with a mortar and pestle to grind the corn. The other thing is that, in some recipes, they use rice flower and still call it majerete. In our family we didn’t do the rice majerete, we used canned corn. Yes, canned corn. In the summer, when sweet corn was available, we would use fresh corn. However, year round, we found that canned corn is just as good. We are not purists in that regard.

Initially, the pudding was made from just 4 ingredients: corn, milk, sugar and cinnamon. In our version we add cornstarch to give it a thicker texture. In Spanish Harlem, we had people who preferred using coconut milk instead of regular whole milk in the preparation. We stuck with the milk. It was the flavor we were use to. Whichever way you spruce it up, you’re gonna love this dessert.

Ingredients:

2 cans (15.25 oz.) corn, drained
2 cups whole milk
Pinch of salt
¾ cup brown sugar
¼ cup cornstarch
2 cinnamon sticks
Ground cinnamon for garnish

Instructions:

  1. In a food processor, add corn, milk, salt, sugar and cornstarch. Blend until pureed.
  2. Strain the mixture through a metal or wire-mesh sieve removing all the corn kernel pulp and leaving just the liquid. You may have to strain it a few times or, if desired, you can use a cheese cloth.
  3. In a medium saucepan or deep skillet, add the corn liquid and cinnamon sticks. Stir to combine until the sugar is dissolved. Cook on medium heat, stirring constantly so that it doesn’t stick to the bottom of the pan and the mixture has thickened to a smooth, pudding-like consistency, about 45 minutes. Rule of thumb: you know it has thickened when it coats the back of a spoon.
  4. Discard cinnamon sticks and transfer the mixture to 6 small dessert cups or one medium size serving bowl. Cool about 10 minutes. Place in refrigerator and chill until cold and set, at least 45 minutes. Garnish with ground cinnamon, if desired.
    Yield: 6 servings.

QUESILLO BLANCO

This is one of the lesser known desserts in criollo cuisine. It is a type of custard for which there is no English translation. Although queso means ‘cheese’ in Spanish, there is no cheese in this dessert. Why it’s called quesillo I have no idea. There are two types of quesillo: one is made with pineapple juice boiled  with sugar, which is then baked and chilled in a mold. The other is Quesillo Blanco. Or White Quesillo. That is the recipe given below. This version is made with eggs and condensed milk. Whatever it is called, forget the  semantics. It’s a truly delicious dessert that will cap a fine end to any meal.

Note that in the dessert, when baked, the custard will rise in the pan, giving it a sooth, delectable pink/russet color that will entice you with a tasty finish.

Quesillo Blanco

Ingredients:

3 eggs, separated
1 14-ounce can sweetened  condensed  milk
Cinnamon for garnish.

Instructions:

  1. Preheat oven to 300 degrees F.
  2.  In separate bowls, beat egg yolks and whites until light and frothy.
  3.  Add yolks to whites and beat well.
  4.  Stir in condemned milk and beat until blended.
  5.  Pour into a 1 quart mold or casserole.
  6.  Fill a baking pan ¾ full with hot water. Place mold in water and bake for 1 hour. The custard will rise in the pan, and is done when a toothpick inserted in center comes out clean.
  7.  You can serve as it or, if preferred, run a knife along rim of mold or casserole and unmold onto a serving dish. Sprinkle with cinnamon and serve.
    Yield: 4-6 servings.

EASY PUMPKIN PIE

A friend had given us a pumpkin and, honestly we thought, what do we do with this thing? A pie? Full disclosure, I am a cook but not a baker. Making pies, to me, has never been something I do on a regular basis. We have a local store where one of the employee makes great pies; and when we need one, we just call them, they bake it right on premises, and we pick it up the next day. So this pie thing, was new to me. But I decided to give it a try.

Now, the recipe given can be done with cooked fresh pumpkin. Problem with that is that you have to cut the thing, take out the seeds, scoop out the interior, etc.. , and then cook it. Last time I checked you can get cooked canned pumpkin. That will save time and effort, and make it a whole lot easier.

The recipe itself is one I got from discussions I had with people who bake. I’ve added a caramelized topping made from slivered almonds since I had a package of almonds on hand. I’m told this is not the usual topping for a pumpkin pie. My learned friends tell me that a pecan topping is the   de rigueur preferred topping for pumpkin pies. Well, the caramelized almond topping turned out great with the pie, so there. Also, the recipe is easy to make, and perfect for a holiday treat.

Another thing,  the idea of making a pie crust from scratch is not something I would contemplate. If you want to do it, go right ahead. I opted for a pre-pared Graham cracker pie shell that can be found in almost any market these days. And you know what? It came out just fabulous.  However you do it, I’m sure the results will be more than satisfactory.

EASY PUMPKIN PIE

Ingredients:

2 eggs, slightly beaten
3/4 cup maple syrup or brown sugar
¼ teaspoon salt
1 teaspoon cinnamon
½ teaspoon ground ginger
¼ teaspoon ground cloves
1½ cups evaporated milk

Instructions:

  1. Preheat oven to 400 degree F.
  2. Blend together eggs and pumpkin. Stir in maple syrup, salt, cinnamon, ginger and cloves. Add and blend in evaporated milk.
  3. Pour into pie shell and bake 45-50 minutes or until  knife inserted in center comes out clean. Cool completely, top with caramelized almond topping and serve.

CRARAMELIZED ALMOND TOPPING

Ingredients:

3 tablespoons soft or melted butter
2/3 cup maple syrup or brown sugar
2/3 cup slivered almonds

Instructions:

  1. In a small bowl, combine butter, maple syrup and almonds.
  2.  Gently drop by spoonfuls over cooled pie to cover top. Place in broiler and broil until mixture begins to bubble, about 3 minutes. Watch carefully: if cooked too long, top will turn syrupy. Cool and serve.


SHERRY BAKED PEARS

I have a friend who has a pear tree. And every year around this time I go to his place and collect a many pears as I can. I do this because every years I make pear schnapps. It’s become a tradition in our family. This time around, as opposed to last year, the tree was fruitful, and we got a lot of leftover pears.  So, apart from pear schnapps, what can I do with these things? The most obvious was create some sort of dessert. And that is the recipe given today, Sherry Baked Pears. Now, keep in mind these are wild pears falling from the tree. Once they hit the ground, they were fairly ripe.  If you try the recipe with store bought pears or those from a farm stand, just make sure they’re ripened.

I make the pears with a combination of sherry, lemon and honey. It makes a delicious sugarless dessert that can be served warm by itself, with whipped cream, or spooned over plain vanilla ice cream.

SHERRY BAKED PEARS

Ingredients.:

1/3 cup water
1/4  cup honey
1 tablespoon lemon juice
2 tablespoons butter
6-8 ripe pears, depending upon size (enough to make 4 cups)

Instructions:

  1. Preheat oven to 350 degrees F.
  2. In a saucepan, combine sherry, water, honey, lemon juice and butter. Bring to a boil, reduce heat and simmer for 5 minutes.
  3.  Wash, core and split pears into halves or quarters. Again, should have enough for 4 cups. Lay pears on a greased baking pan or dish and bake for 1 hour.
    Yield: 4 or more servings.


BANANA HALVAH

The following recipe is a dessert, and an Indian dessert at that. You may ask, why do I hype an Indian dessert? Simple: because it is delicious and  easy to make. As I’ve discovered, it pays to explore  and discover other cuisines and cultures. That’s the process of growth.

Halvah is a sweet, dense confection popular in India. It could be that it derived from Arabic cuisine and subsequently spread throughout the sub-continent. It can be made from many ingredients, such as tahini (sesame paste), nuts, beans, lentils and vegetables. Our version consist of bananas. You can make this one as sweet as you want, or less sweet, for that matter.  And the sweetener can be plain sugar, cane sugar, honey, or even maple syrup. You are only limited by your imagination.

Now, for this recipe you may use clarified butter, also known as ghee. I’ve discovered that it comes out just as good using regular butter. But, if you’re a traditionalist, an easy way to make clarified butter is: melt 2 cups butter in a heavy pan over gentle heat and cook without stirring until the butter begins to foam. Skim off the foam and continue heating without browning, skimming frequently until the butter stops foaming.  Let the butter cool until the sediment has sunk to the bottom of the pan. Strain the liquid through a cheesecloth or fine strainer into a container. Cover and store in the refrigerator until required.

BANANA HALVAH

Ingredients:

6 large bananas, peeled
3 tablespoons butter or ghee (see recipe above)
1¼ cup water
¾ cup sugar  or honey
½ teaspoon ground cardamom

Instructions:

  1. Cut the bananas into 1-inch pieces.
  2. Heat the butter (or ghee) in a pan over moderate heat and stir-fry the bananas for 4-5 minutes until soft. Remove from heat and smash the bananas with 3 tablespoons of the water. Return to the heat and cook 2-3 minutes more, stirring frequently,
  3.  In a separate pan, dissolve the sugar (or honey) in the remaining water over low heat. Pour the syrup over the bananas and continue cooking, stirring frequently for 15-20 minutes or until the mixture is quite thick. Stir in  the cardamom.
  4.  Spread the mixture into a buttered dish or plate. Allow to cool. Cut into small pieces and chill before serving.
    Yield: 8 servings.


i

Tembleque (Coconut Custard)

Tembleque (pronounced “Tem-Bleh-Keh”) is the chief custard-based dessert in our repertoire. It’s been around in Puerto Rican cuisine for as long as anyone can remember. And it makes sense since coconuts are so prevalent in the island of Puerto Rico. Let me add that tembleque makes a fine dessert for the holidays, be it Hanukkah or Christmas. Something sweet to liven up this time of year.

When I was growing up back on the block, it was a  family favorite. And in those days it was a hell of a bother to prepare.This was long before coconut milk began arriving on store shelves. We used genuine coconuts to extract the coconut milk required in the dish. First you took 2 large ripe coconuts, pierced them with a screwdriver, and drained their liquid into a small bowl. Then you split the coconuts and removed the inner white meat from the shell; and then separated the brown skin from the coconut meat. Next, you broke the coconut meat into pieces, rinsed them under cold water, and grated them finely. You placed this in a bowl; and added enough water to reserve coconut liquid so that it measured 3 1/2 cups. You boiled this liquid and added the grated coconut. You drained this liquid in a colander or strainer, pressing with hands to extract the coconut milk into a bowl. Next step, you heated 1 cup water, adding the same coconut shreds as before and again strained it into the bowl that held the coconut milk. Finally, you discarded the shreds. And this was the coconut milk that formed the basis of the tembleque.

The above method is interesting but time consuming.Today you can just go out and buy a couple of cans of coconut milk in any store. No need for any of the mess and bother described above. Which, by the way, is the original recipe I give in my cookbook Puerto Rican Cuisine in America (Avalon Books, Running Press). So, try out this fine dessert. It will leave you hankering for more.

  TEMBLEQUE
(Coconut Custard)

2 cups coconut milk
2 teaspoons cornstarch
1/2 cup brown sugar
1/2 teaspoon salt
1 teaspoon vanilla extract
Ground nutmeg
Ground cinnamon

1. In a large pot or saucepan, combine cornstarch, sugar, salt and vanilla. Stir in coconut milk, a little at a time, and blend well.
2. Cook on moderate heat, stirring constantly with a  wooden spoon until mixture thickens.
3. Reduce heat to low and stir until mixture boils.
4. Remove from heat and pour into a slightly wet mold, or 6 small molds, or round pan.
5. Let cool, and refrigerate until firm. Invert into molds or serving dish. Sprinkle with nutmeg and cinnamon and serve.
    6 servings.

Papaya Preserve for the Holidays

Back on the block, the favorite dessert for this time of year was, invariably, bread pudding or, as we called it, “Budin.” The rest of the year, our desserts were the usual stuff: tembleque (a coconut based custard) or flan. But, for the holidays, my mother also created a family favorite: Dulce de Lechosa (Papaya Preserve). We weren’t the only ones. Our barrio neighborhood would be redolent with the fragrance of simmered papayas ready to be consumed by all. Neighbors would vie as to who had the best dulce de lechosa in the apartment building. Every time I prepare this regal dish, those memories awaken.

Let me state that papayas are as delicate fruit. When green they taste awful.They are best when ripe. But be aware that if too ripe, they’ll dry out. You can discern ripeness by a smooth yellow color and tenderness to the touch. Overripe papayas will start to discolor. So seek out fruit that is mellow yet firm and unblemished. For cooking purposes, a moderately ripe one will do. Some cooks claim only green papayas should be used for making a preserve. The problem with that is that more sugar or honey is needed. Whether ripe or green, store the preserve in the refrigerator in a glass bowl.

The recipe given is from my cookbook Puerto Rican Cuisine in America (Perseus Books – Running Press). Though this dessert is common in the holidays, you can serve all year round. It’s that good. Also, some prefer to serve it over ice cream, or with whipped cream on top. In my family we like it as is, with nothing extra to mar it’s great taste.

DULCE DE LECHOSA
    (Papaya Preserve)

3 medium ripe papayas, peeled, seeded and cut into 1/2-inch strips.
1/4 teaspoon salt
2 quarts water
2 sticks cinnamon
1 teaspoon ground anise seed
2-3 cups sugar, depending on taste, or 1/2 cup honey (or more to taste)

1. Place papayas in a saucepan with water to cover. Add salt and let stand 5 minutes.
2. Drain and rinse under cold running water. Place in a pot or heavy kettle but not aluminum for it will stain. Add 2 quarts water, cinnamon stick and anise seed.
3. Bring to a boil and cook on low-moderate heat, uncovered for 15 minutes or until tender.
4. Add sugar or honey and continue cooking, uncovered, for 20 minutes or until sugar is thick and syrupy.
5. Remove cinnamon sticks and allow papaya to cool at room temperature.
6. Serve in a dessert bowl or store in a glass jar or container.

    Yield: 4 servings.

Photo: courtesy of PK Diet


Enhanced by Zemanta

Rice Cake, Glazed and Ornamented


Marie Antoine Careme is regarded as the leader of what is called la grande cuisine Francaise. That is, the classic French style of cooking heavy on sauces, heavy on creams, heavy on decoration, heavy on everything. Careme had an impressive resume. At various times he was chef de cuisine to Czar Alexander I and the Rothschilds. But his recipes are daunting. Most are difficult to emulate, even in a modern kitchen. Case in point are his famous chartreuse dishes such as Chartreuse printuniere (Sping Chartreuse), Chartreuse à la parisienne, en surprise, and Chartruese de perdreaux, which he called “the queen of all entrees.”  These were molded dishes using an assortment of vegetables, fowl, wild game, sausages, and a host of other stuff. His Paris Chartreuse even has truffles, pullets, fillets, forcemeat (meat mixture with fat), and lobster tail all baked in a cylindrical mold.

I took one look at these recipe and said, No way. It would take forever to do one of these things. But you have to give credit to the man. His list of classic French dishes is exhaustive. With such works as L’art de la cuisine au dix-neuvième siècle (The Art of the Kitchen at the XIX Century) and Le mâitre d’hôtel francais (The Mâitre d’ of the French Hotel) he not only discussed garnishes and accessories, but also took on such topics as the provisioning and organization of the kitchen. All that said, I did manage to find one recipe which I can identify with. And which under the circumstances, is not that difficult to make.  So, kiddies, here’s your chance to create something on the grande mode of classical cuisine. This will surely impress family and friends. You’ll become the Julia Child of your set. The recipe is Rice Cake Glazed and Ornamented. I give it exactly as noted by Monsieur Careme.

RICE CAKE, GLAZED AND ORNAMENTED

Put 8 ounces of rice, boiled as usual, with the addition of a clove of vanilla, in a semi-globular mold, buttered; then turn it on a dish, and when cold, mask it all over with transparent apricot-marmalade. Decorate the top and the sides, according to your fancy, with pistachios, angelica, currants, verjus grapes, and preserved cherries. Serve it up, either hot or cold.

   Yield: about 4 servings

Note: Verjus grapes are unripe, green grapes. You can substitute seedless green grapes if convenient.

Caption: courtesy of exclassics

Enhanced by Zemanta
Older posts

© 2024 Oswald Rivera

Theme by Anders NorenUp ↑